Try QatafMinds PoS Now
Once you are satisfied, Contact us to purchase a license and unlock full features.

Point-of-Sale system that is easy to set up and use! Bill your customers quickly and get insights on your business efficiently. Suitable for small to medium businesses like restaurants, cafes, retail shops, service providers, etc.
Start by setting up Categories which are a grouping for your products or services. Then add various items or services under Products.
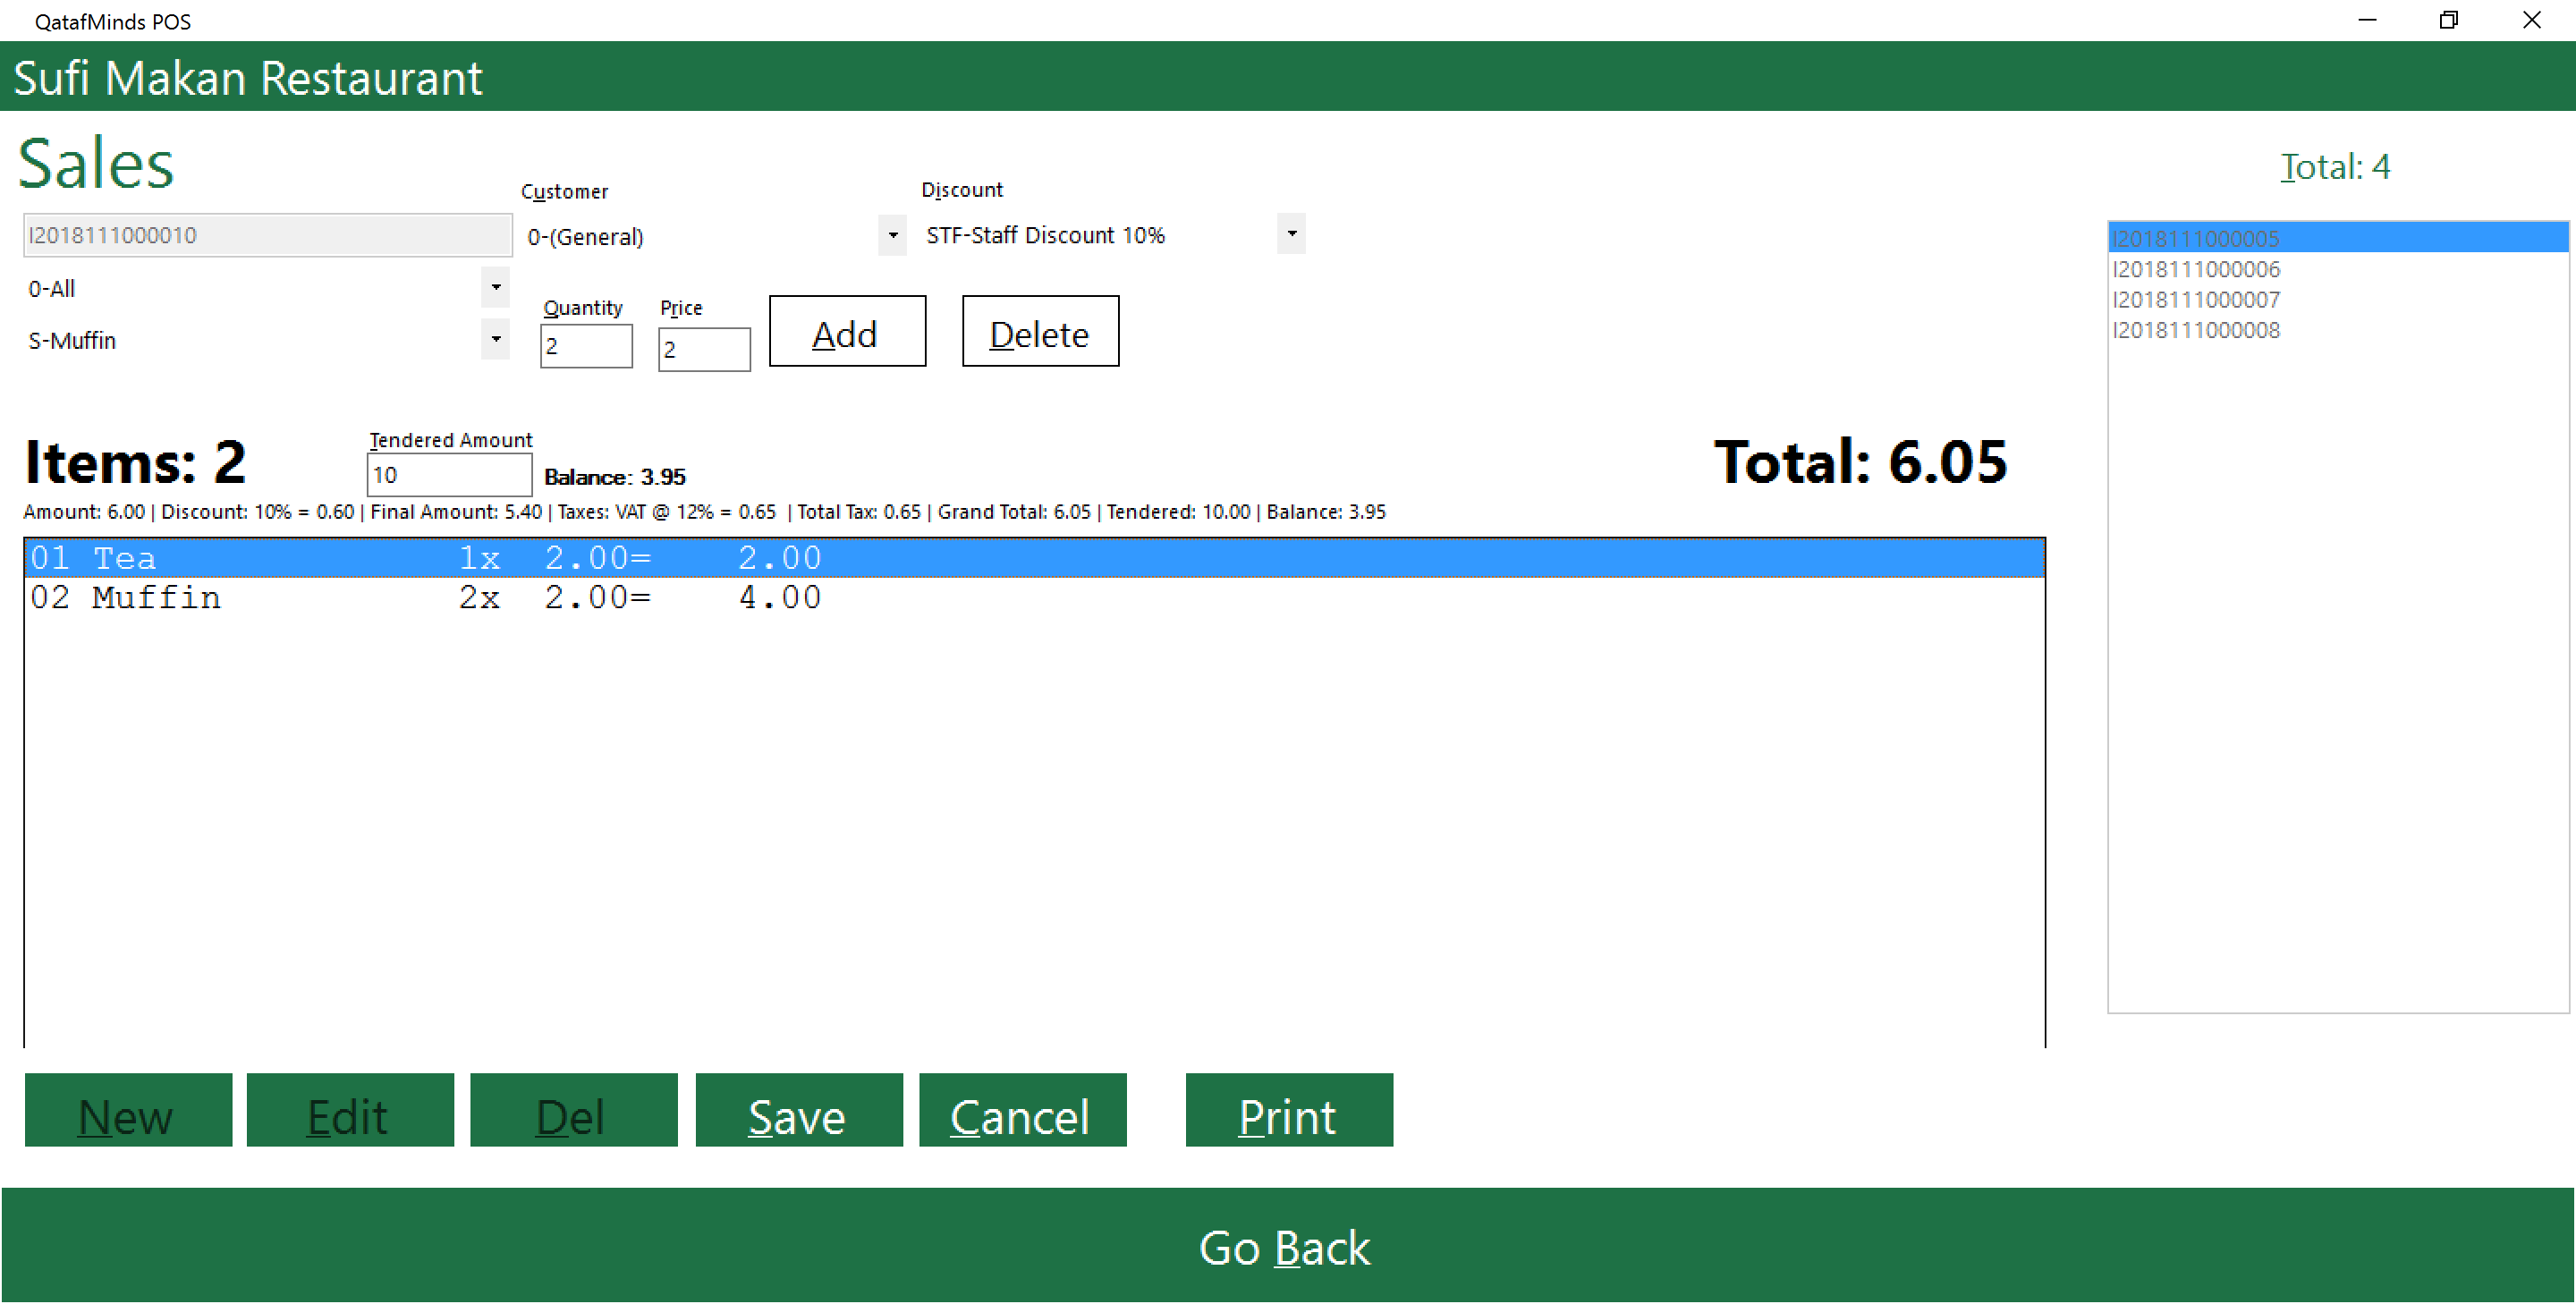
When the customer has purchased/used your prodcuts/services, you can then charge with an Invoice. All the products you set up earlier will be available here. Once multiple products are added to the Invoice, you can save it and print to give it to the customer. The Reports section will provide insights into your total income/sales grouped by products with details like quantity, average price, etc.
Once you are satisfied, Contact us to purchase a license and unlock full features.
System Requirements:
- Windows 10 or Windows 8 or Windows 7.
- The application depends on .NET Framework 4.6. So if it is not available on your system, it will be first downloaded and installed.
1. Click on the DOWNLOAD NOW button above and save the file to your computer.
2. Double click on the downloaded "QatafMindsPoS" file.
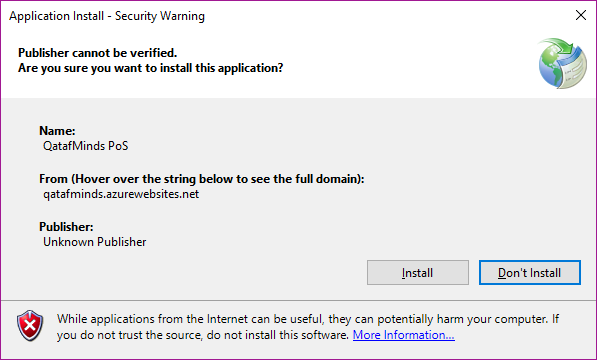
3. Windows will show a security warning window. Click on "Install" button.
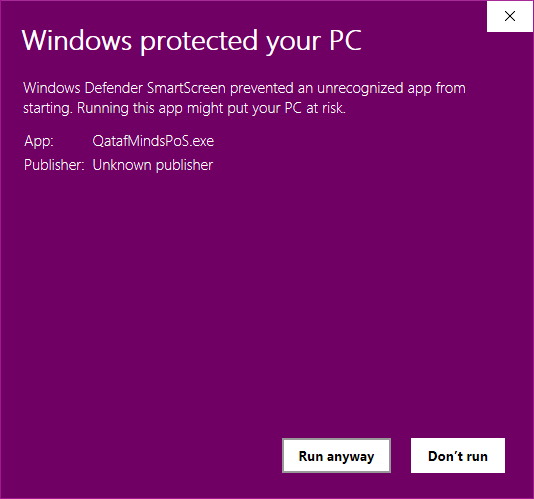
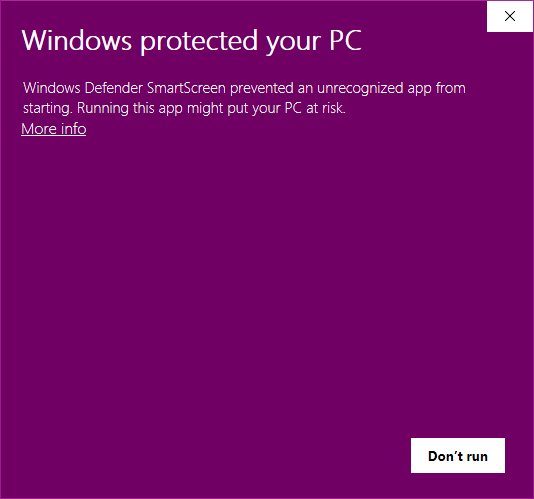
4. Windows will show another warning from Windows Defender. Click on the "More Info" link. Then click on the "Run anyway" button.
5. Now the application will be launched.
6. From next time onward, you can directly launch the application from the Start menu. Look for "QatafMinds PoS" and click on it.
1. Contact us or one of our sales partners to purchase a license key.
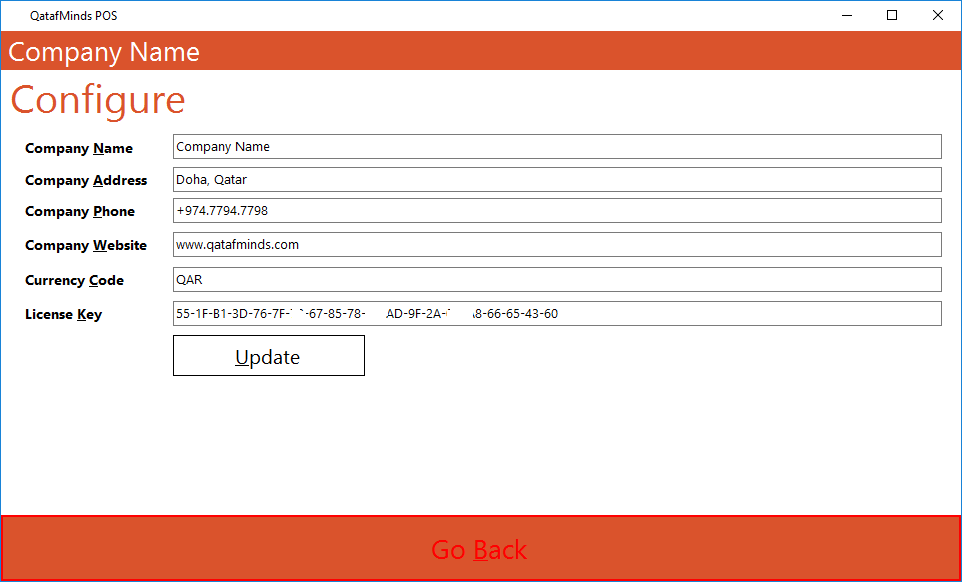
2. Click on the Settings button on the Home Screen to open the settings screen.
3. Provide your company name exactly like the one you used while purchasing the license key.
4. Provide company address, phone and website information. Note that all these details will be printed on the sales receipts and other relevant places.
5. Provide the currency code or symbol that you want to appear in the sales receipt.
6. Copy paste the license key as provided by us or our sales partner.
7. Click on the "Update" button and you will see a message "Configuration updated successfully!" in green color.
8. If you are seeing a "Invalid license key!" message in red color, make sure that you have spelled your company name correctly and is the same one used for license purchase.
- Once you have installed and configured, it is easy to use this system as all the buttons are self explanatory.
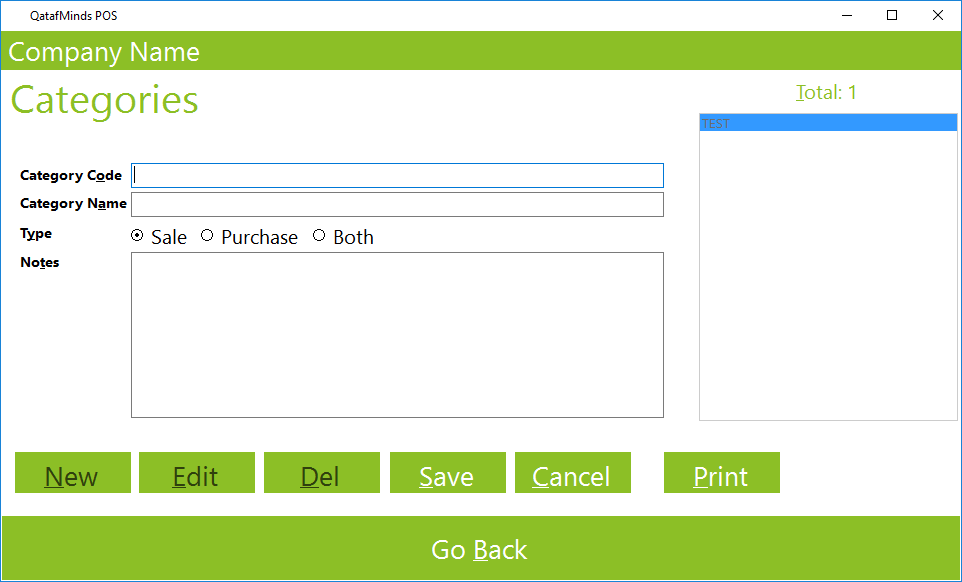
- You can start by defining some product or serrvice categories or groups.
- From the home screen, click on "Categories" button to go to the categories module. If you have a touch screen, you can touch the button or you can also use Alt + C as a short cut key if you prefer using keyboard. When you press the Alt key, the buttons or labels will show the short cut key as underlined. You can use the Tab key to move from one control to the next and use Space or Enter key to click on a control.
- Note that when you load a module, all the controls in it will be initially disabled.
- Click on the New button. This is used to create a new record. You can now enter the details like Code, Name, Type and Notes for the category.
- Click on Save button to save the data.
- The right side box will show all the records that are already created. When you click on them, their details will be loaded. Then you can click on Edit button to modify that record or Delete button to delete that record.
- You can use the Cancel button during new record creation or edit to discard the changes you made.
- Print button will print all the records if it is a master data module like Category and Product or will print a receipt if it is Sales module.
- At any time, click on the Go Back button to return back to the home screen.
